I made a guitar out of LEGOs and epoxy resin, aka – the Legocaster!! I’m so excited to share this Lego epoxy guitar build. I had no idea how the Legos would hold together with the epoxy resin, but in the end, I think the guitar came out pretty sharp looking.
Read MoreBuilding a 1980s Steve Vai JEM Guitar from Scratch
This episode shows how to build and hydrodip a DIY guitar body. The process of hydro-dipping a guitar is also known as a swirl dip, swirl paint, or swirling. I used basic woodworking skills to build the guitar body, and the swirl paint finish is inspired by Steve Vai’s Ibanez JEM guitar.
Read MoreHow to Make Simple DIY Geometric Succulent Planters
This time I show how to make modern DIY geometric succulent planters using simple woodworking skills.
Read MoreHow to make a Modern Concrete Planter Box || Easy DIY Outdoor Project
In this episode, I’m collaborating with Hikoki / Metabo HPT on a limited tools project — a modern outdoor concrete planter box. As part of this collaboration, Hikoki is doing a GIVEAWAY of one of maker kits, including a circular saw, drill, and sander. Enter via Hikoki’s Instagram page here: http://bit.ly/2IQTWbj
Back to the planter box, this is a great outdoor project that can add a touch of color and plants or flowers to any deck, yard, or other outdoor setting. I designed this outdoor DIY planter so it can be made with only a circular saw, drill, and sander (and of course the usual small things that are needed for mixing concrete and assembling a melamine form). A miter saw is nice, but not required.
The planter is poured into a melamine form, which has an inner and outer form. To achieve the colors and thin walls of this planter, I used a GFRC concrete mix. I also used PVC trim to create channels wrapping around 3 sides of the planter After pouring the concrete for the body of the planter, I came back and used red, orange, and yellow pigment in the GFRC mix to fill the channels with a gradient of pigmented concrete.
More details for the HIKOKI / METABO HPT GIVEAWAY:
Entry Link: http://bit.ly/2IQTWbj
Prize: A maker kit including a cordless circular saw, drill, and sander from Hikoki / Metabo HPT (these tools are from the former Hitachi, which now goes by Metabo HPT in North America, and Hikoki everywhere else).
Contest Details: Go to my post on the @hikokiuk Instagram account: http://bit.ly/2IQTWbj On the post, tag a friend and comment, and use the hashtag #MakerGiveaway, and that’s it. The contest is open worldwide.
You can enter up to 3 times by doing the same on the posts for Chris and Keith's projects (also on the Hikoki Intstagram account). Terms and conditions apply and are available via Hikoki’s Instagram account.
Thanks much to Hikoki for supporting my channel and the maker community as a whole!
-- OTHER HIKOKI LIMITED TOOLS VIDEOS –
Chris Salomone’s Modern Shelving Unit: https://youtu.be/aWoycQK9Msg
Rag n’ Bone Brown’s Cat Bed Cabinet: https://www.youtube.com/watch?v=KtpzaeimrGI
METABO HPT / HIKOKI TOOLS:
Multivolt 36V Circular Saw: http://bit.ly/2Vmuz7T
Multivolt 36V Cordless Miter Saw: http://bit.ly/2Zx6quE
Multivolt 36V Hammer Drill: http://bit.ly/2ZuKsIw
Random Orbit Sander: https://amzn.to/2PsqPfH
-- FOLLOW –
Modustrial Maker Instagram: @modustrialmaker - https://goo.gl/F4UdEs
-- OTHER PRODUCTS USED IN THE BUILD –
o PVC trim: https://amzn.to/2XHi8B0
o GFRC Concrete Mix: https://goo.gl/keUX8H
o 1.5 Bag of AR Glass Fibers: https://goo.gl/t4qpTN
o Cake Fondant Tool for perfect edges: http://amzn.to/2w0JCVx
o Helical Mixing Padde: https://amzn.to/2GFyxjF
o Concrete mixer: http://amzn.to/2kEnZFi
o Colored concrete pigments: http://bit.ly/2GxzWrf
o blue pigment #2 (small quantity): https://amzn.to/2DaNoTw
o concrete sealer: http://amzn.to/2xW7Gth
o Black 100% Silicone Caulk: http://amzn.to/2B64iRY
o Paste Finishing Wax: http://amzn.to/2kF565e
o GFRC Recipes (w/ product links): https://goo.gl/35RvFM
This project is part of a paid partnership with Hikoki Tools.
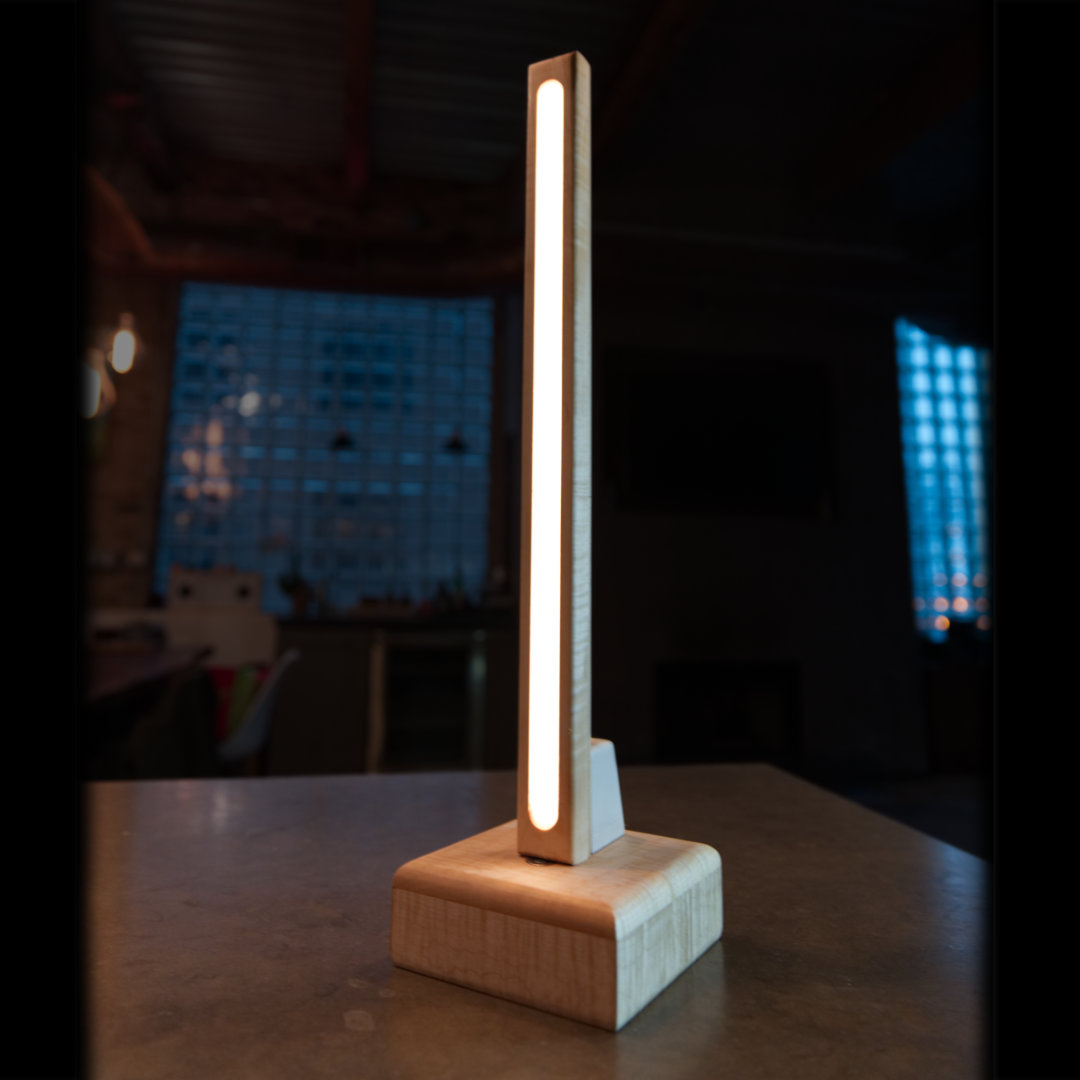
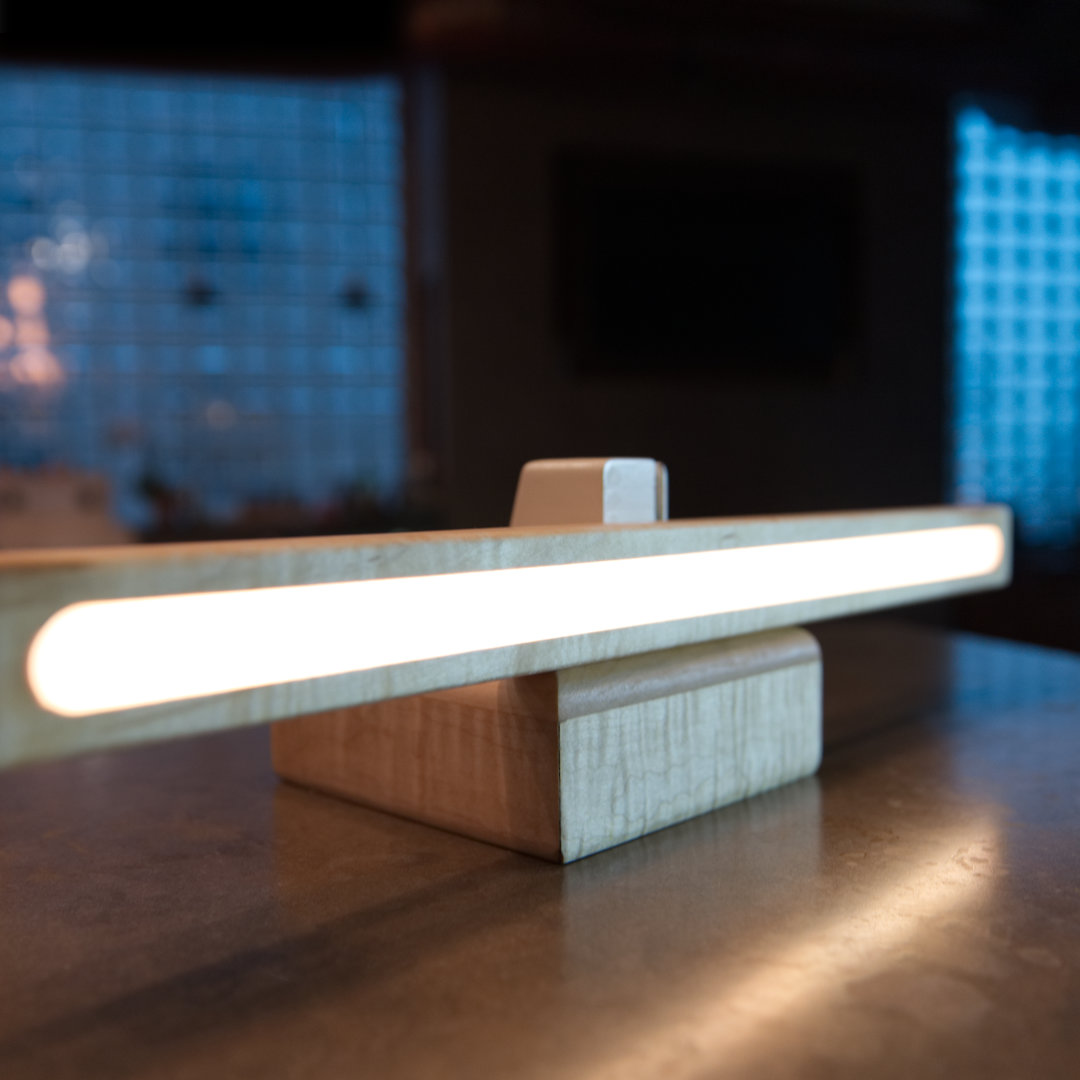
I made a wireless 3-in-1 RAINBOW RESIN lamp -- TRANSFORMS from Sconce -> Table Lamp -> Task Light using Magnets and Magic!!
This video shows how to make a wireless DIY rainbow epoxy resin LED lamp that transforms between a sconce, table lamp, and task light.
This is a simple DIY woodworking and epoxy resin project. I used a layer of white epoxy resin covered by a layer of clear epoxy resin to diffuse the LED strips. The lamp is made of three pieces that connect with a clever system of magnets and steel washers, that allow you to transform the lamp from a vertical sconce, to a horizontal scone, to a desk lamp or table lamp, to a task light. And since the lamp is battery-powered and rechargeable, it is easy to use in many situations. (The batteries last about 3 hours under normal use.) To top it off, the LED controller I used has a Bluetooth app, that allows the LEDs to be controlled via a Bluetooth connection to your phone.
The lamp base and light bar are made from hardwood maple, and involve fairly simple woodworking skills. The support block was 3D modeled in Fusion 360 and 3D printed using my Anycubic 3D printer.
The LED strips I used were SK6812 RGBWW LEDs. These LED strips are individually controllable neopixels that have RGB LEDs and separate warm white LEDs, so the lamp can do colorful displays and operate in a music syncing mode, or serve as a more refined and sophisticated warm white light source.
\\ FOLLOW ME on INSTAGRAM //
https://goo.gl/F4UdEs (@modustrialmaker)
\\ MODUSTRIAL MAKER GEAR – MUCH LOVE FOR YOUR SUPPORT! //
\\ TOTAL BOAT EPOXY LINKS //
Total Boat High-Performance Epoxy Resin (get 20% off with code "MODUSTRIAL"): http://bit.ly/2uMsaEE
Total Boat THIXO Fast Cure Epoxy: http://bit.ly/2FNxFYz
\\ OTHER PRODUCTS //
o Countersunk rare-earth magnets: https://amzn.to/2uN9d4I
o Heat Gun: https://amzn.to/2seaErS
o White Epoxy Pigment: https://amzn.to/2LC3o1z
o RGBWW LED Strips (144 LED/m): https://amzn.to/2WIAelC
o Bluetooth LED Controller: https://amzn.to/2FZDpQq
o 18650 Li-ion Batteries: https://amzn.to/2CYy75P
o Battery Holder: https://amzn.to/2K6xBZC
o Mini USB Battery Charging Board: https://amzn.to/2BKdJF3
o Cordless drill and driver: https://amzn.to/2IaVrRi
o Aluminum channel for LEDs: https://amzn.to/2CYJN8D
o My favorite solder: http://amzn.to/2CNgjIF
o Quality Soldering Iron Kit: http://amzn.to/2CKHoMC
o Blue Soldering Mat: http://amzn.to/2DboPCd
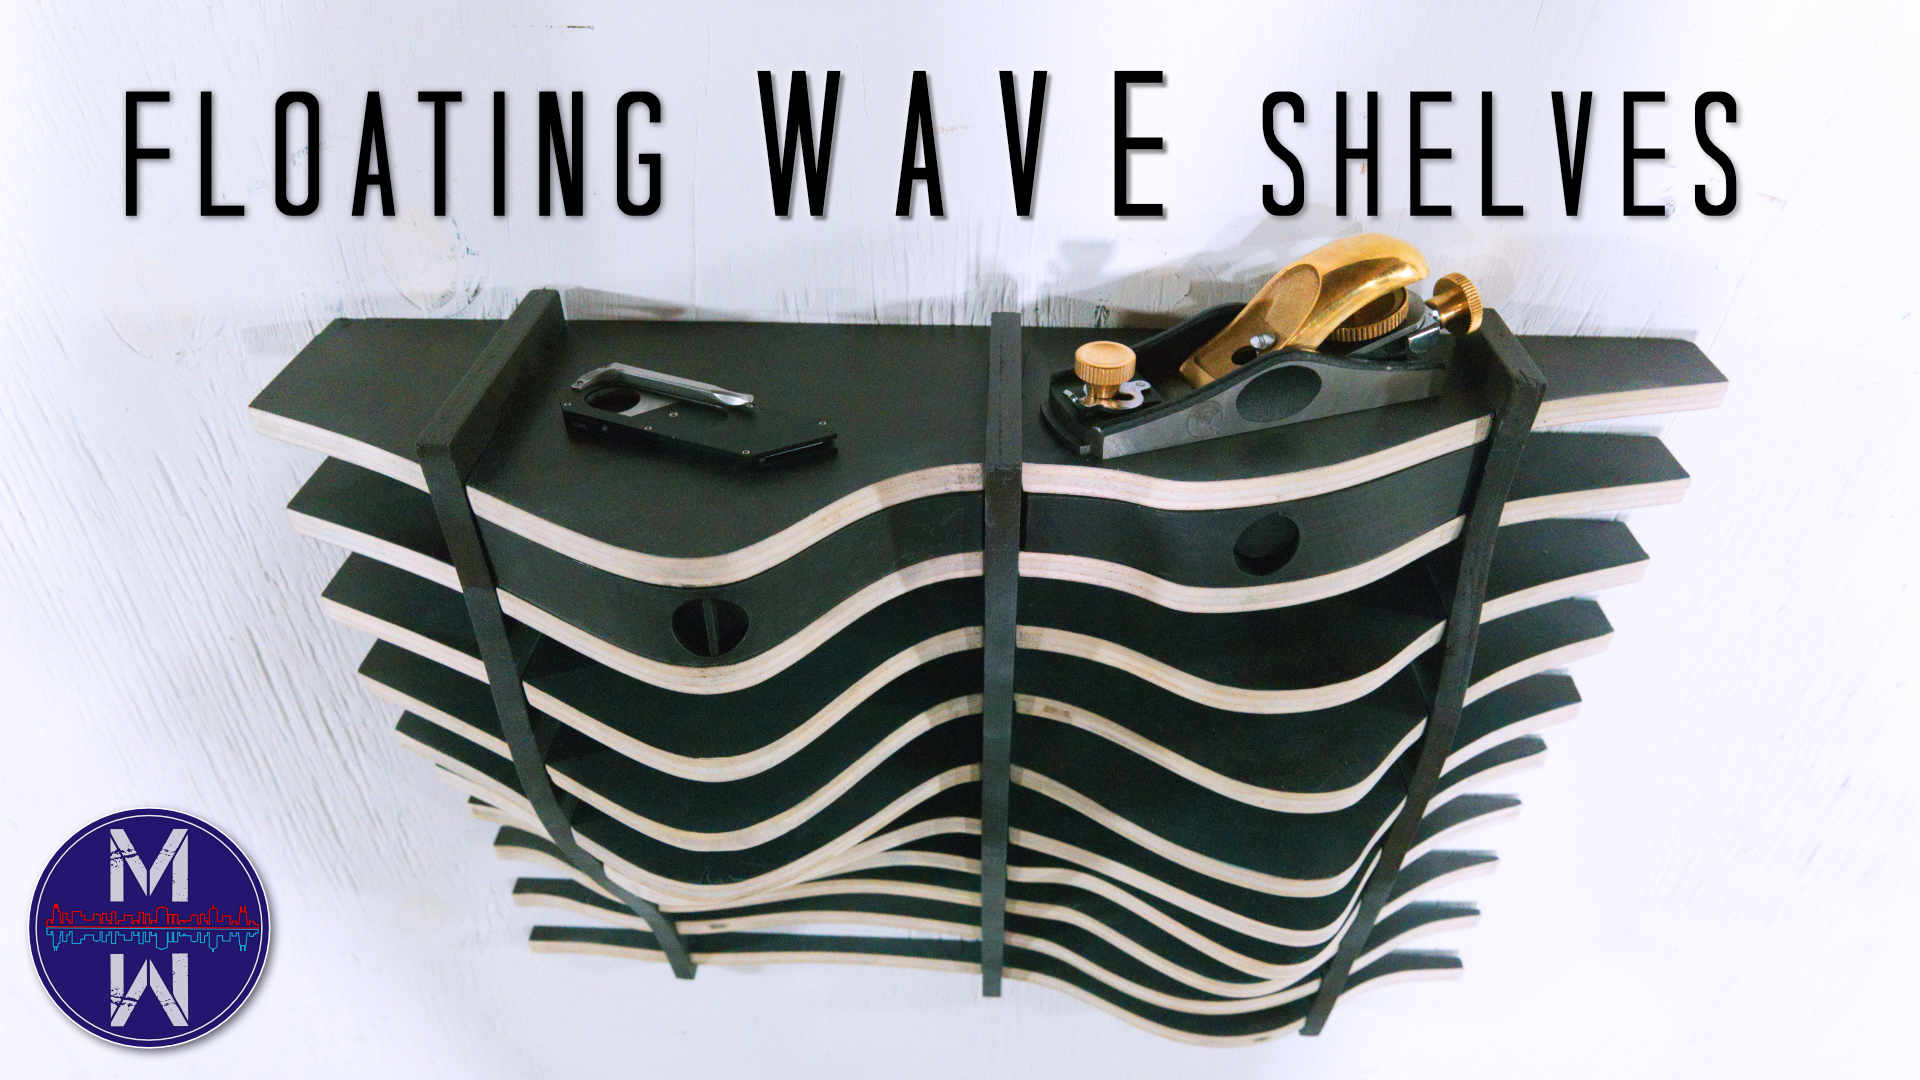
Making a Floating Shelf with "Wave" shape using Fusion 360 and CNC (or with standard Woodworking tools)
This video shows how to make modern DIY floating shelves using easy woodworking or a CNC. This floating shelf was made from three 2'x4' plywood sheets. I'm going to be using these DIY modern shelves as small parts storage in my workshop. This is about as close to making a shop project as you'll see :)
The video shows not only how to make a modern floating wave shelf, but also how to use parametric design in Fusion 360 to create all kinds of cool parametric furniture and designs. Specifically, I used the Slicer plug-in for Fusion 360,allows you to take 3D models and slice them into 2D shapes that snap together. The software also will automatically create 2D templates of the pieces, so that you can cut them out with a jigsaw or bandsaw, making this a simple woodworking project. Or you can cut it out of the 1/2" plywood on your X-Carve CNC using the Easel project I created (link below).
PDF PLANS / TEMPLATE: http://bit.ly/mm_waveshelf
EASEL PROJECT FOR SHELVES: http://bit.ly/2FpVua5
Sign up for a FREE EASEL account: https://www.inventables.com/technologies/easel?ref=modustrial
Inventables X-CARVE CNC: https://www.inventables.com/technologies/x-carve?ref=modustrial
To see some people taking this type of parametric design to the next level, who I was inspired by, check these folks out:
- Harrington Design: @harrington_design_co
- P.Metric: @parametric.arch
\\TOOLS//
double sided carpet tape: https://amzn.to/2UQL096
glue sticks: https://amzn.to/2ULn3jp
one-and-done spray paint: https://amzn.to/2ugmd2o
Jigsaw: https://amzn.to/2UI4IUo
Cordless Track Saw: https://amzn.to/2LuE6EV
Table Saw: https://amzn.to/2A4tQP9
\\ FOLLOW ME//
INSTAGRAM - @modustrialmaker - https://goo.gl/F4UdEs
BLOG - www.modustrialmaker.com
Making a Battery-Powered Epoxy LED Cube Lamp w/ Wireless Charging
In this video, I show how to make a DIY wireless-charging battery-powered epoxy resin LED cube lamp. Since this DIY LED cube light is battery powered and wirelessly charged it is totally portable and has a ton of uses -- a mood light, a party light, a night light, etc. The video also shows how to make the custom wireless charging pad for the epoxy LED cube, which an easy woodworking project. This LED cube light is battery-powered by a LiPO.
I used Total Boat 2:1 epoxy resin to make the cube, doing small 1/2" epoxy pours to build up the epoxy in the melamine form. All the electronics are off the shelf parts from Amazon, including the music reactive sp106e LED controller.
FOLLOW ME on INSTAGRAM
https://goo.gl/F4UdEs (@modustrialmaker)
MODUSTRIAL MAKER SHIRTS – MUCH LOVE FOR YOUR SUPPORT!
https://bit.ly/2RGgVXB
PRODUCT LINKS:
o Heat Gun: https://amzn.to/2seaErS
o Total Boat Epoxy Resin: https://amzn.to/2RFzYRS
o Pendant Light Kit: https://amzn.to/2UF9Qc4
o 5V LED Strip: https://amzn.to/2Emga2h
o 5V music sync LED controller: https://amzn.to/2PArObU
o LiPo Battery: https://amzn.to/2DVfFKZ
o Wireless Charging Receiver: https://amzn.to/2NeXBQp
o Wireless Charging Pad / Transmitter: https://amzn.to/2VaRZJH
o Battery Charging Protection Board: https://amzn.to/2BKdJF3
o Aluminum Foil Tape: https://amzn.to/2L36CK5
o Fine Grit sanding pads: https://amzn.to/2Fk8X50
o Cordless Drill & Driver: https://amzn.to/2F9y0b5
o World’s Greatest Sander: https://amzn.to/2PLUJOB
o Bench Cookies w/ Finishing Cones: http://bit.ly/2F9woy3
o Bench Cookie T-Track Risers: http://bit.ly/2OwHqNa
o Universal T-Track: http://bit.ly/2yZ62JL
o T-Track Clamps: http://bit.ly/2OxMPU6
o T-Track Hold-down Clamps: http://bit.ly/2qB0jVy
Making a Concrete & Epoxy-Covered LED Desk Lamp
In this tutorial video, I show how to make a modern DIY LED table lamp or desk lamp from concrete, a 2x4, epoxy resin, and a water pipe. This is a fairly simple DIY woodworking and concrete project with a modern look. To make this modern LED light I cut a channel in a 2x4, and put a PEX tube in it, then poured epoxy over the tube. This created a hollow channel where I could insert an LED strip. The tube and epoxy act as a diffuser for the LED lighting.
FOLLOW ME on INSTAGRAM
https://goo.gl/F4UdEs (@modustrialmaker)
MODUSTRIAL MAKER SHIRTS – MUCH LOVE FOR YOUR SUPPORT!
https://bit.ly/2RGgVXB
-- MY HEARING-PROTECTION HEADPHONES (Isotunes): https://goo.gl/gUFswE
PRODUCT LINKS:
o Heat Gun: https://amzn.to/2seaErS
o Total Boat Epoxy Resin: https://amzn.to/2RFzYRS
o White Epoxy Pigment: https://amzn.to/2LC3o1z
o 120 LED/m LED Strips: https://amzn.to/2SoLFx5
o 12V LED Power Supply: https://amzn.to/2LB40oa
o Aluminum Foil Tape: https://amzn.to/2L36CK5
o Fine Grit sanding pads: https://amzn.to/2Fk8X50
o Cordless Drill & Driver: https://amzn.to/2F9y0b5
o World’s Greatest Sander: https://amzn.to/2PLUJOB
o Bench Cookies w/ Finishing Cones: http://bit.ly/2F9woy3
o Bench Cookie T-Track Risers: http://bit.ly/2OwHqNa
o Universal T-Track: http://bit.ly/2yZ62JL
o T-Track Clamps: http://bit.ly/2OxMPU6
o T-Track Hold-down Clamps: http://bit.ly/2qB0jVy
How to Make a EPOXY LED pendant light - new DIY video up now!!
This time I show how to make a DIY Epoxy LED pendant light.
Read MoreMaking a BLUE CONCRETE & Plywood Bench || DIY Tutorial
This tutorial explains how to make a modern DIY bench with blue concrete legs and a plywood top.
Read MoreMaking an Impossibly Thin Curved Concrete Bench -- Find out How!
Find out about the special type of concrete that allows for this insanely thin bench to be made, and whether the bench actually can hold two adult males…..
Read More"Soundwave" Ikea Hack - Nordli Dresser & Media Center || How to make your own doors for an Ikea cabinet
This Ikea hack video shows to make your own drawer fronts for the Ikea Nordli dresser. The Nordli dresser is very low-profile, and also makes a great media center – I’m actually going to be using my Nordli hack as a combination dresser / media center in my bedroom. This is a DIY woodworking project that can be as easy or as difficult as you want it to be, and use everything from high-tech CNC machines to hand tools. The only limit is your imagination.
Read MoreMaking a HUGE Timber Beam Lamp with Music Reactive LEDs
This episode shows how to make a modern industrial LED floor lamp from a reclaimed timber beam and steel, with NO WELDING!
Read MoreHow to Make a Pixelated Plywood River Bench -- the Anti-River Table
This video shows how to make a DIY Plywood and Epoxy Resin River Bench.
Read MoreHow to Make a Mint Green Concrete & Steel Stool (and a white one too)
In this video, I show how to make a DIY mint green concrete stool with a welded steel base. Yes, the concrete is mint colored :) I also made a white concrete stool to go with it. The mint concrete color was achieved by using a combination of green and white powdered pigments in Fishstone's glass fiber reinforced concrete (GFRC) concrete mix.
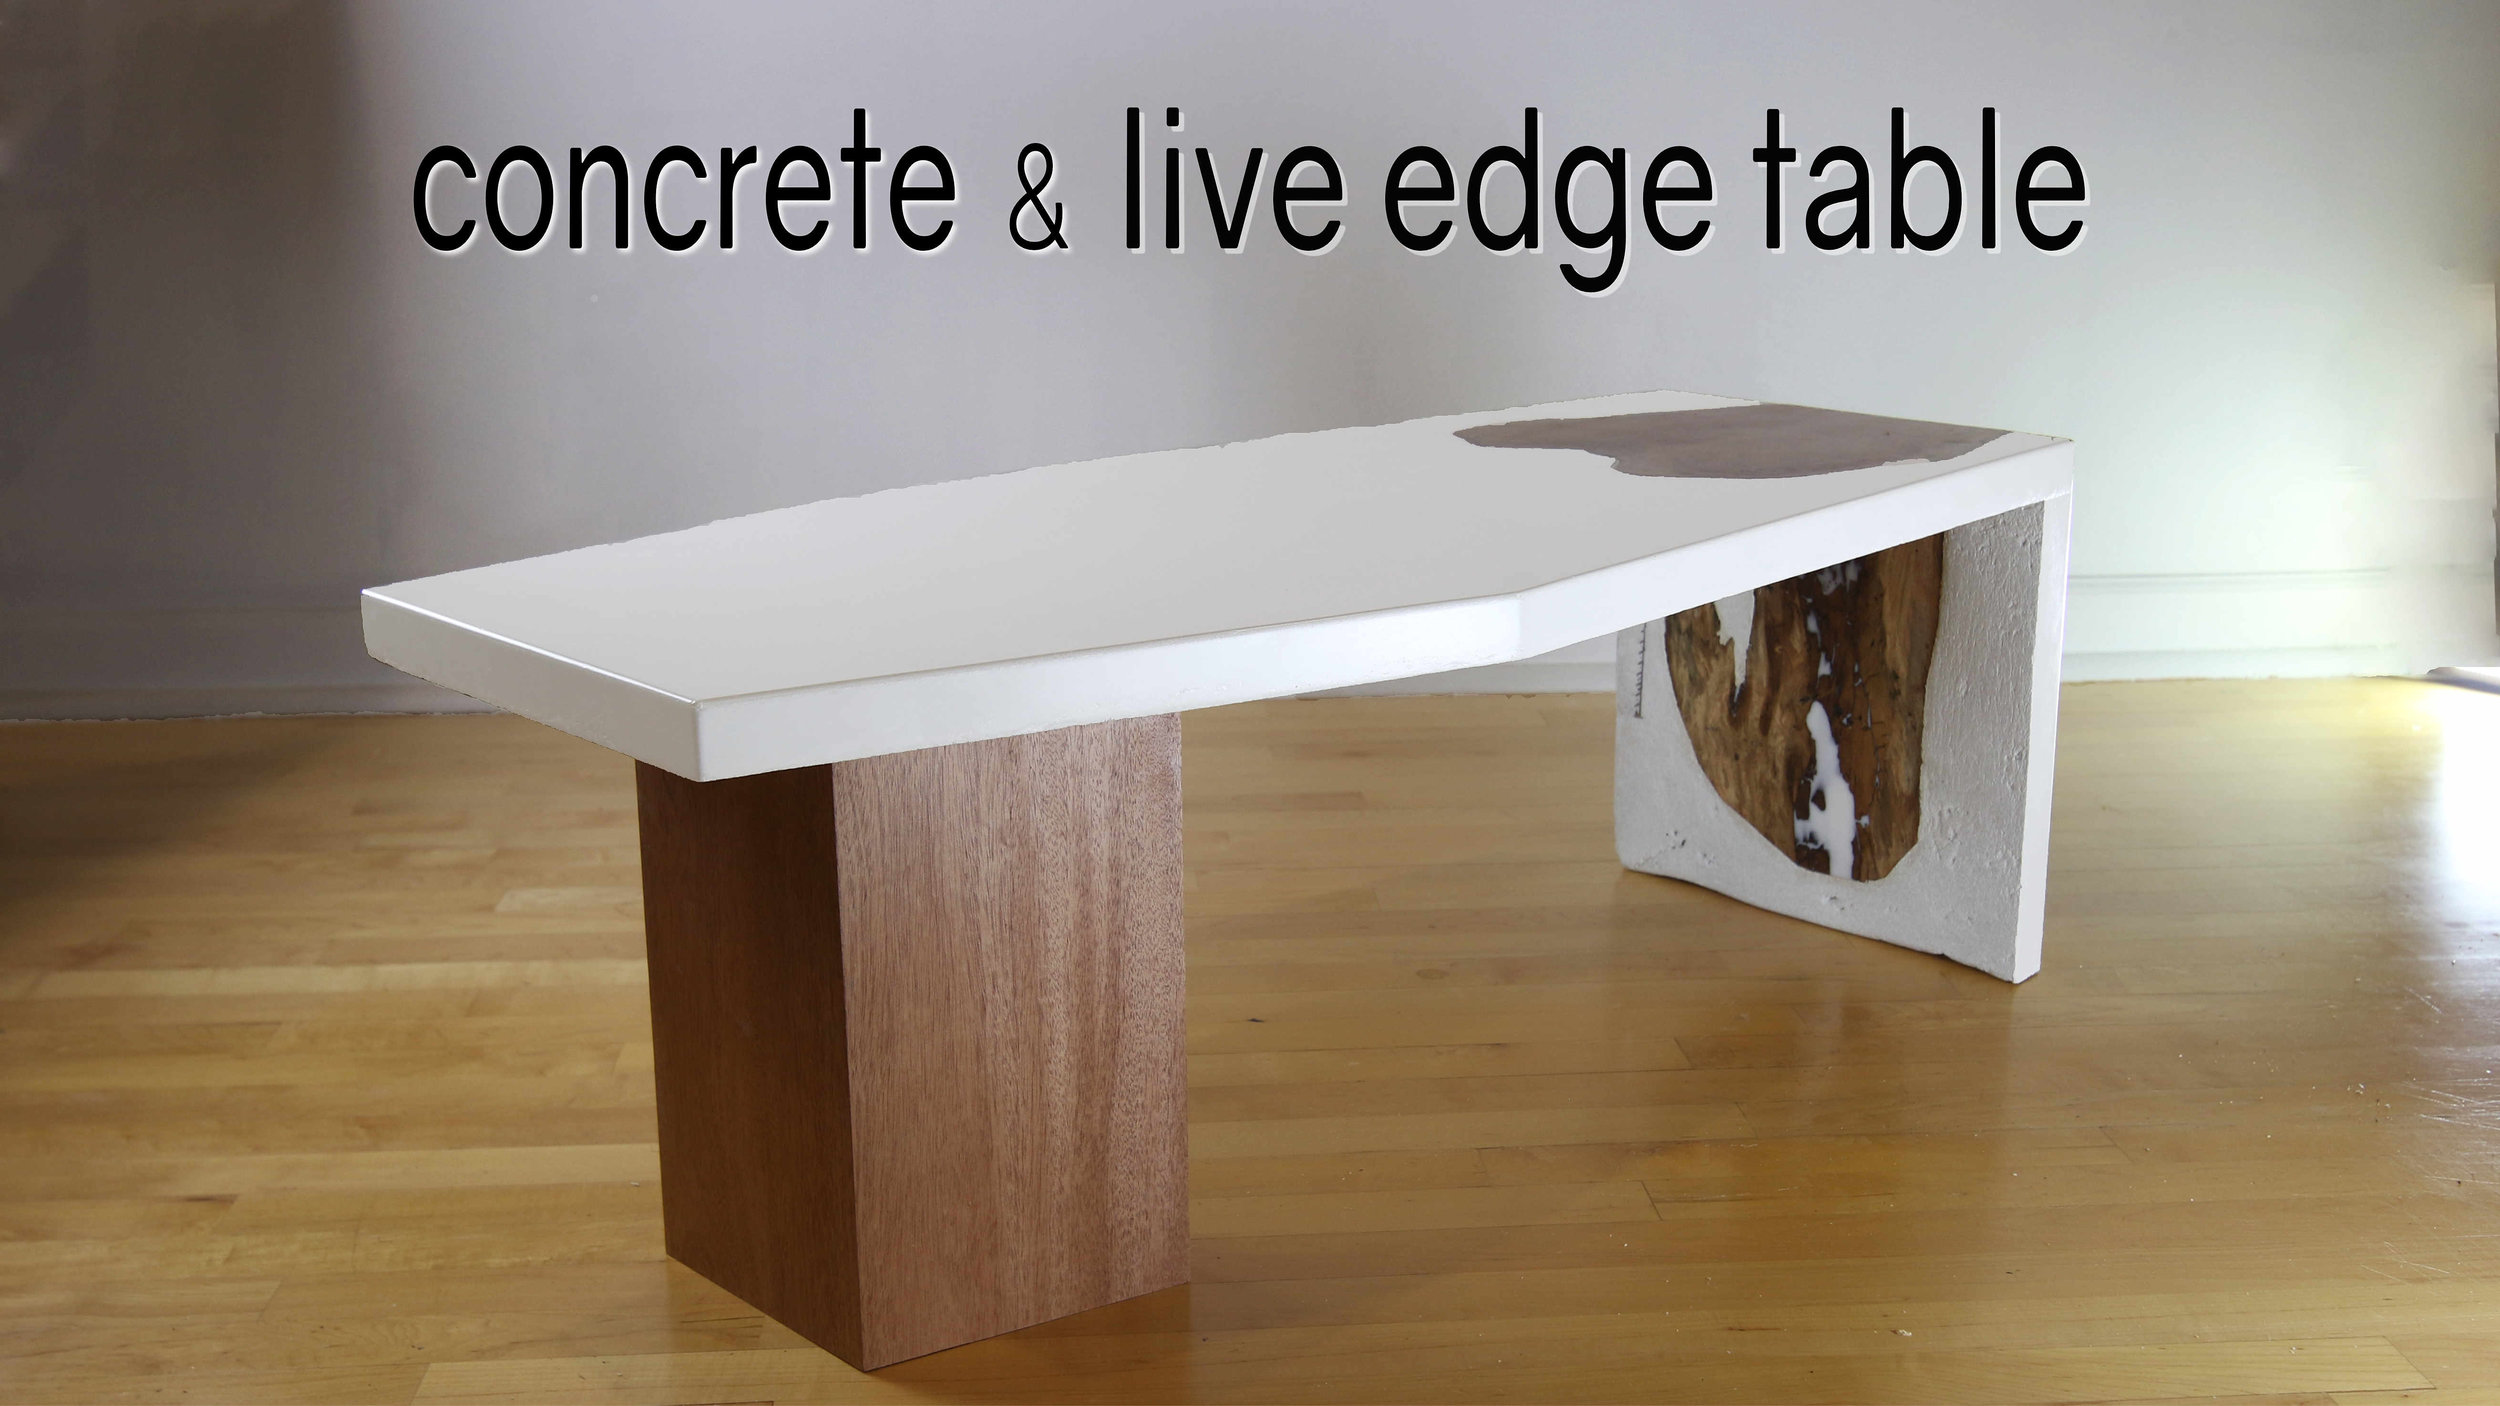
Read MoreHow to Make a Live Edge Waterfall Concrete Table
In this video, I show how to make a DIY Waterfall Concrete Coffee Table with a Live-Edge Slab Inlay. I used a white glass fiber reinforced concrete (GFRC) mix to get the gleaming white concrete. The live edge slab is Cuban mahogany and the legs are made from African mahogany.
Read MoreStep-by-Step Tutorial to make a Bluetooth Boombox from Recycled Skateboards -- Available Now!
I just uploaded a full step-by-step tutorial to Instructables explaining how to make my ported Bluetooth boombox from recycled skateboards. While the tutorial explains the process using the reclaimed skateboard wood, it can be easily adapted to use any kind of wood you have available.
Check it out here: https://www.instructables.com/id/Turning-Recycled-Skateboards-Into-a-Bluetooth-Boom/
Read MoreNEW VIDEO is Up! BLUETOOTH BOOMBOX made from recycled SKATEBOARDS -- check it out! →
In this video, I show how to make a portable bluetooth boombox from twice recycled skateboard wood. I managed to use every part of the skateboard in this DIY speaker build. The front panel is formed from reclaimed skateboard wood, the handle of the speaker is made from skateboard trucks, and the feet are made from skateboard wheels and bearings.
I used Dayton Audio kit parts for the electronics. It has a 2x50w Bluetooth amp, which is driving two Tang Band 5” W5-2143 full range speaker drivers. It is battery powered, with great battery life, and most importantly, sounds amazing!
A huge shout out to KIRBY MEETS AUDIO for his help in designing the speaker enclosure and selecting the Tang Band drivers. His channel has a wealth of information on speaker design and speaker building, and his video production is top notch. Go subscribe to Kirby Meets Audio if you haven’t already!
KIRBY MEETS AUDIO YOUTUBE CHANNEL: https://goo.gl/8gFxnw
Also, a big thanks to FOCUSED SKATEBOARD WOODWORKS for sending me their offcuts and making this build possible. Check them out!
Web: https://goo.gl/tM4T2s
Instagram: @focused_skateboard_woodworks
SPEAKER PARTS USED IN BUILD
• Bluetooth Amplifier Board: https://goo.gl/UgQ4wq
• 5” Full-Range Drivers: https://goo.gl/4WXUtJ
• Battery Charger Board: https://goo.gl/1w3C74
• Li-ion Batteries: https://goo.gl/LUPbzs
• 19V Power Supply: https://goo.gl/t2sZwB
• “L” Brackets for Amp and Battery Boards: https://goo.gl/SQzwwQ
• Cable Kit (on/off. Volume, line input): https://goo.gl/XY6gcy
• 2.5” Ports: https://goo.gl/mQwhL2
TOOLS FOR ELECTRONICS
• My favorite solder: http://amzn.to/2CNgjIF
• Quality Soldering Iron: http://amzn.to/2CKHoMC
• Blue Soldering Mat: http://amzn.to/2DboPCd
WOODWORKING TOOLS
• Cordless Nailer: http://amzn.to/2FJIsFW
• Ridgid Cordless Router: http://amzn.to/2pinfZL
• 90 Degree driver / oscillating saw: http://amzn.to/2FHqrbB
• Hole Saw Kit: http://amzn.to/2GztkIw
• RZ dust mask: http://amzn.to/2wM8F1t
• Bosch 18V cordless circular saw: http://amzn.to/2wcDgnN
• Bosch 18V cordless Drill & Impact Driver Kit: http://amzn.to/2BCI753
• Dewalt Table Saw w/ 32” Rip Capacity: http://amzn.to/2yQd2Fy
• Japanese Flush Cut Hand Saw: http://amzn.to/2yRa1Fd
• Dewalt 12” Miter Saw: http://amzn.to/2yQRgS6
• Forstner Bits: http://amzn.to/2Bgv863
FOLLOW ME ON INSTAGRAM: @modustrialmaker || https://goo.gl/3Yqo2m
For those interested in building one of these, here are the calculations for the Tang Band 5" speakers and 2.5" ports. The below shows the enclosure for a single speaker -- for the boombox, you'll have two enclosures; one for each speaker.
NEW VIDEO! Making a "LIVING ART" LED Desk LAMP
In this video I show how to make a Modustrial-designed DIY “Living Art” LED lamp from plywood and an LED matrix.
The LEDs in the lamp are controlled by an Arduino Nano that creates colorful moving patterns, aka, “living art.” However, it is also very practical for use as a desk lamp, table lamp, or bedside lamp, since an LED push button allows you to switch from the living-art mode to normal white-light modes, and a red-nightlight mode.
I made three versions of this lamp – two out of bamboo plywood, and one out of walnut plywood. You could use any type of plywood you like to build the lamp.
The electronics were designed to be very simple. It can be built with NO SOLDERING.
To see the finished walnut version of the lamp, FOLLOW ME ON INSTAGRAM: https://www.instagram.com/modustrialmaker/ || @modustrialmaker
PARTS FOR THE BUILD:
• 16x16 LED Matrix: http://amzn.to/2BgIcsj
• Arduino Nano: (pre-soldered) http://amzn.to/2H0h6bS
• Arduino Nano Screw Terminal Shield: http://amzn.to/2FZwy6y (pre-soldered)
• 5V Momentary LED push button: http://amzn.to/2CLbu2E OR https://goo.gl/Cn1iDy
• JST Connectors: http://amzn.to/2ALve4j
• Semi-transparent white acrylic sheet: https://goo.gl/YV4X81
• Female Power Jack: http://amzn.to/2H3oN0P (no solder) || http://amzn.to/2ziyuEB (solder)
• Lever-nut Wire Connectors: http://amzn.to/2BhMtvM
• 5V power supply: http://amzn.to/2zgiGSJ
ARDUINO NANO CODE FOR THE LAMP: https://github.com/modustrialmaker/Living_Art_LED_Matrix_Lamp
ELECTRONICS TOOLS
• My favorite solder: http://amzn.to/2CNgjIF
• Quality Soldering Iron: http://amzn.to/2CKHoMC
• Blue Soldering Mat: http://amzn.to/2DboPCd
OTHER TOOLS I USE:
• Tap Drill Bit (for threaded holes): http://amzn.to/2Fm7V4A
• RZ dust mask: http://amzn.to/2wM8F1t
• Bosch 18V cordless circular saw: http://amzn.to/2wcDgnN
• Bosch 18V cordless Drill & Impact Driver Kit: http://amzn.to/2BCI753
• Dewalt Table Saw w/ 32” Rip Capacity: http://amzn.to/2yQd2Fy
• Japanese Flush Cut Hand Saw: http://amzn.to/2yRa1Fd
• Dewalt 12” Miter Saw: http://amzn.to/2yQRgS6
• Forstner Bits: http://amzn.to/2Bgv863
Mancave Makeover Ep. 2 is available on YouTube -- DIY Floating TV Panel & Reclaimed Wood Feature Wall
This is the second of two videos for the mancave makeover received by a lucky friend. In the first video, I showed how to make a concrete waterfall countertop (be sure to check it out if you haven't already: https://youtu.be/8vRc4F9MvtE). In this second installment, I show how to make and install a reclaimed wood feature wall with a floating LED TV panel.
The video also shows the installation of Ikea Sektion cabinets with Kungsbacka front panels, so I guess you could consider this an Ikea hack of sorts :)
The TV panel is formed of two frames. The TV is mounted to the front frame, which is larger than the rear frame, and LED strips are attached around the rear frame. This arrangement hides the LEDs, so they emit nice glow from behind the panel, and make the TV panel appear as if it is floating in front of the wall.
We used Stikwood reclaimed weathered wood in white to cover the walls and TV panel. It is a peel n' stick product that is really easy to install.
STIKWOOD
- white peel n' stick wood: (slightly different type than we used): http://amzn.to/2DybS4v
- J-Roller: http://amzn.to/2BVltlB
LED PRODUCTS
• LED Controller w/ Remote: http://amzn.to/2ltWX41
• WS2812 30 LED/m strips : http://amzn.to/2CqUZtk
• WS2813 Strips (new LED chip w/ data redundancy): http://amzn.to/2zOIjt4
• 5V LED power supply: http://amzn.to/2EgyV5b
TOOLS I USE:
- RZ dust mask: http://amzn.to/2wM8F1t
-Tacklife Laser Level: http://amzn.to/2ltdh4X
- Tack Life Level: http://amzn.to/2yQhYuk
- Bosch 18V cordless circular saw: http://amzn.to/2wcDgnN
- Bosch 18V cordless Drill & Impact Driver Kit: http://amzn.to/2BCI753
- Dewalt Table Saw w/ 32” Rip Capacity: http://amzn.to/2yQd2Fy
- Dewalt 12” Miter Saw: http://amzn.to/2yQRgS6
